Installation
There are two possible ways to install the SESMG application. It can chosen between the installation as an independent application, which is appropriate for common users, and an installation for advanced users or developers. We recommend the installation as an independent application for the beginning. You can easily switch later on.
We recommend the extended installation which will create the SESMG with its folder structure on your machine allowing you to work on it or adjust settings. You can follow the extended installation instructions below. If you have programming experience and want to set your own virtual environment (e. g. allowing the usage of Anaconda enviroments) you can follow advanced installation instructions.
Extended Installation
Windows
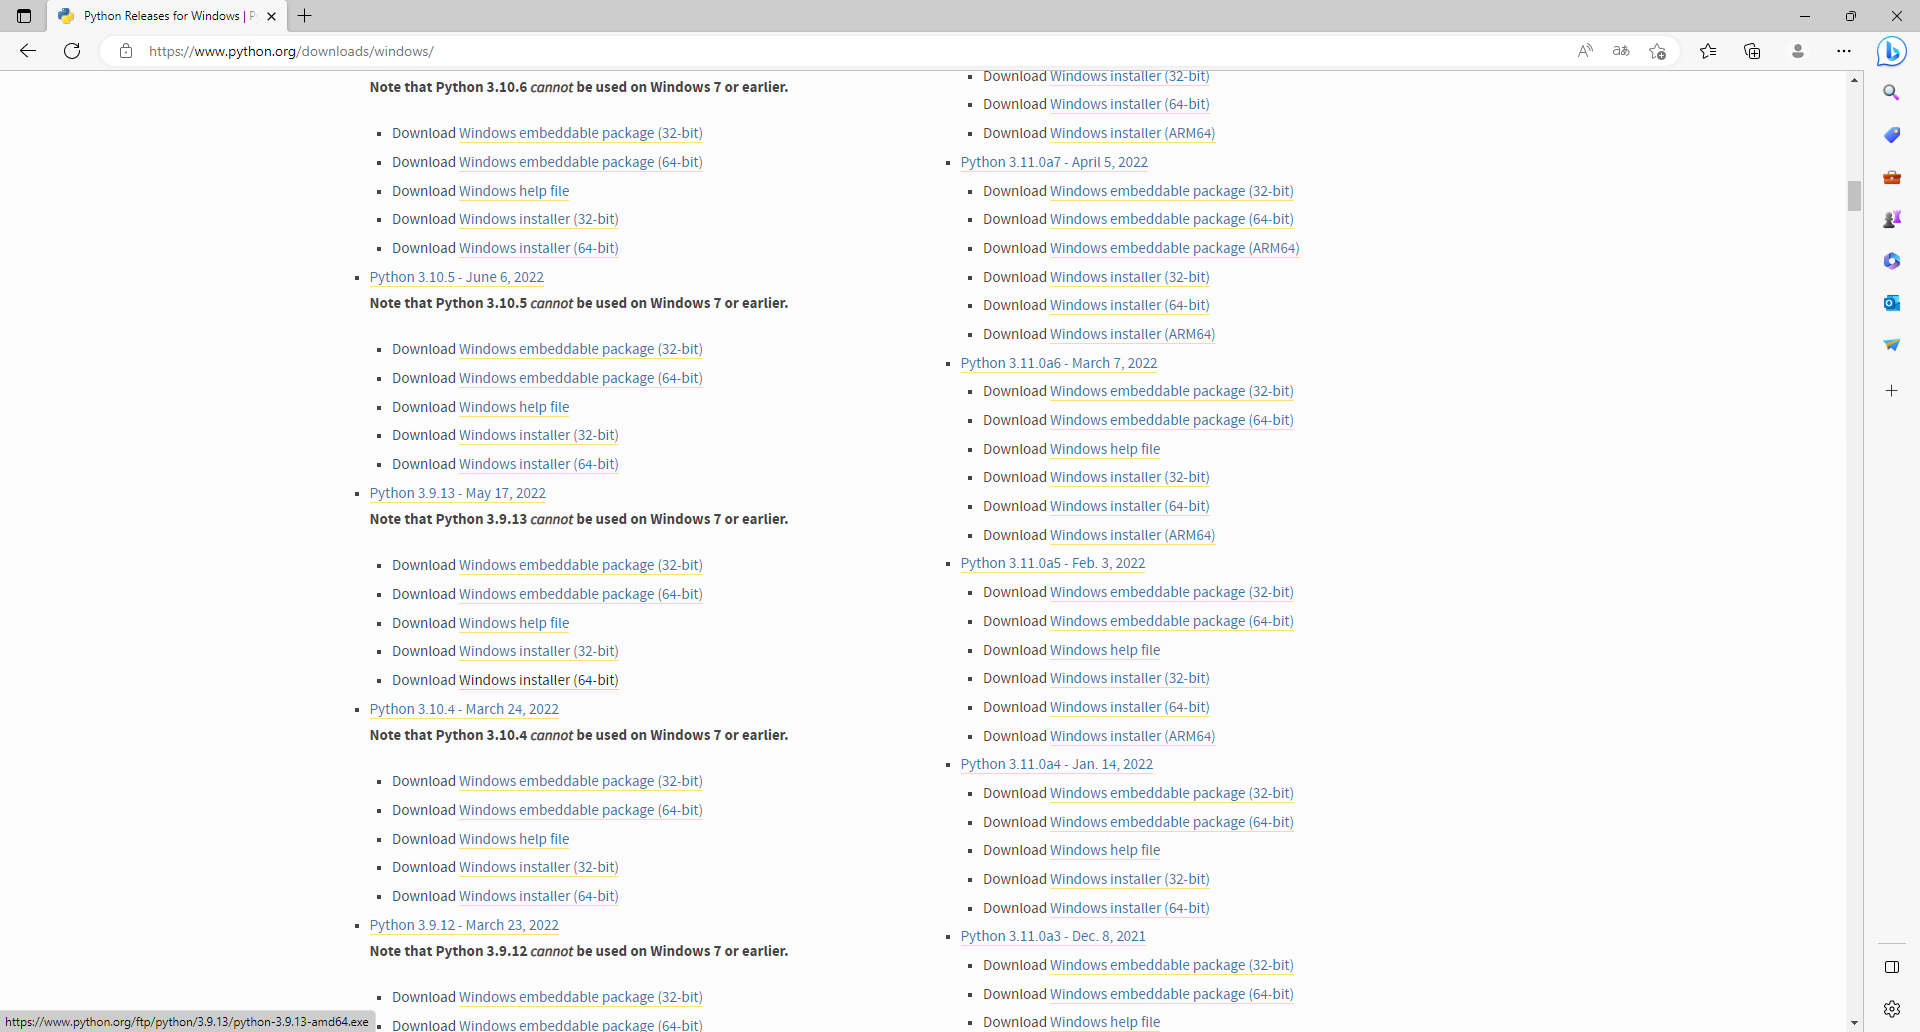
1. Installing Python (3.9, 3.10 or 3.11) Windows users can find the versions here: Python download page for windows
Note
Make sure to use the installer referring to your windows version (e.g. “Windows x86-64 executable installer” for windows 64-bit version). You can check the build in bit version following these steps.
Note
The SESMG is not compatible with the Python version 3.9.7, due to a conflicting bug in this version to the subpackage streamlit. You need do install another Python version or update to another Python version e. g. 3.9.13, which is widely tested.
Note
Make sure to select “Add python to PATH” at the beginning of the Python installation.

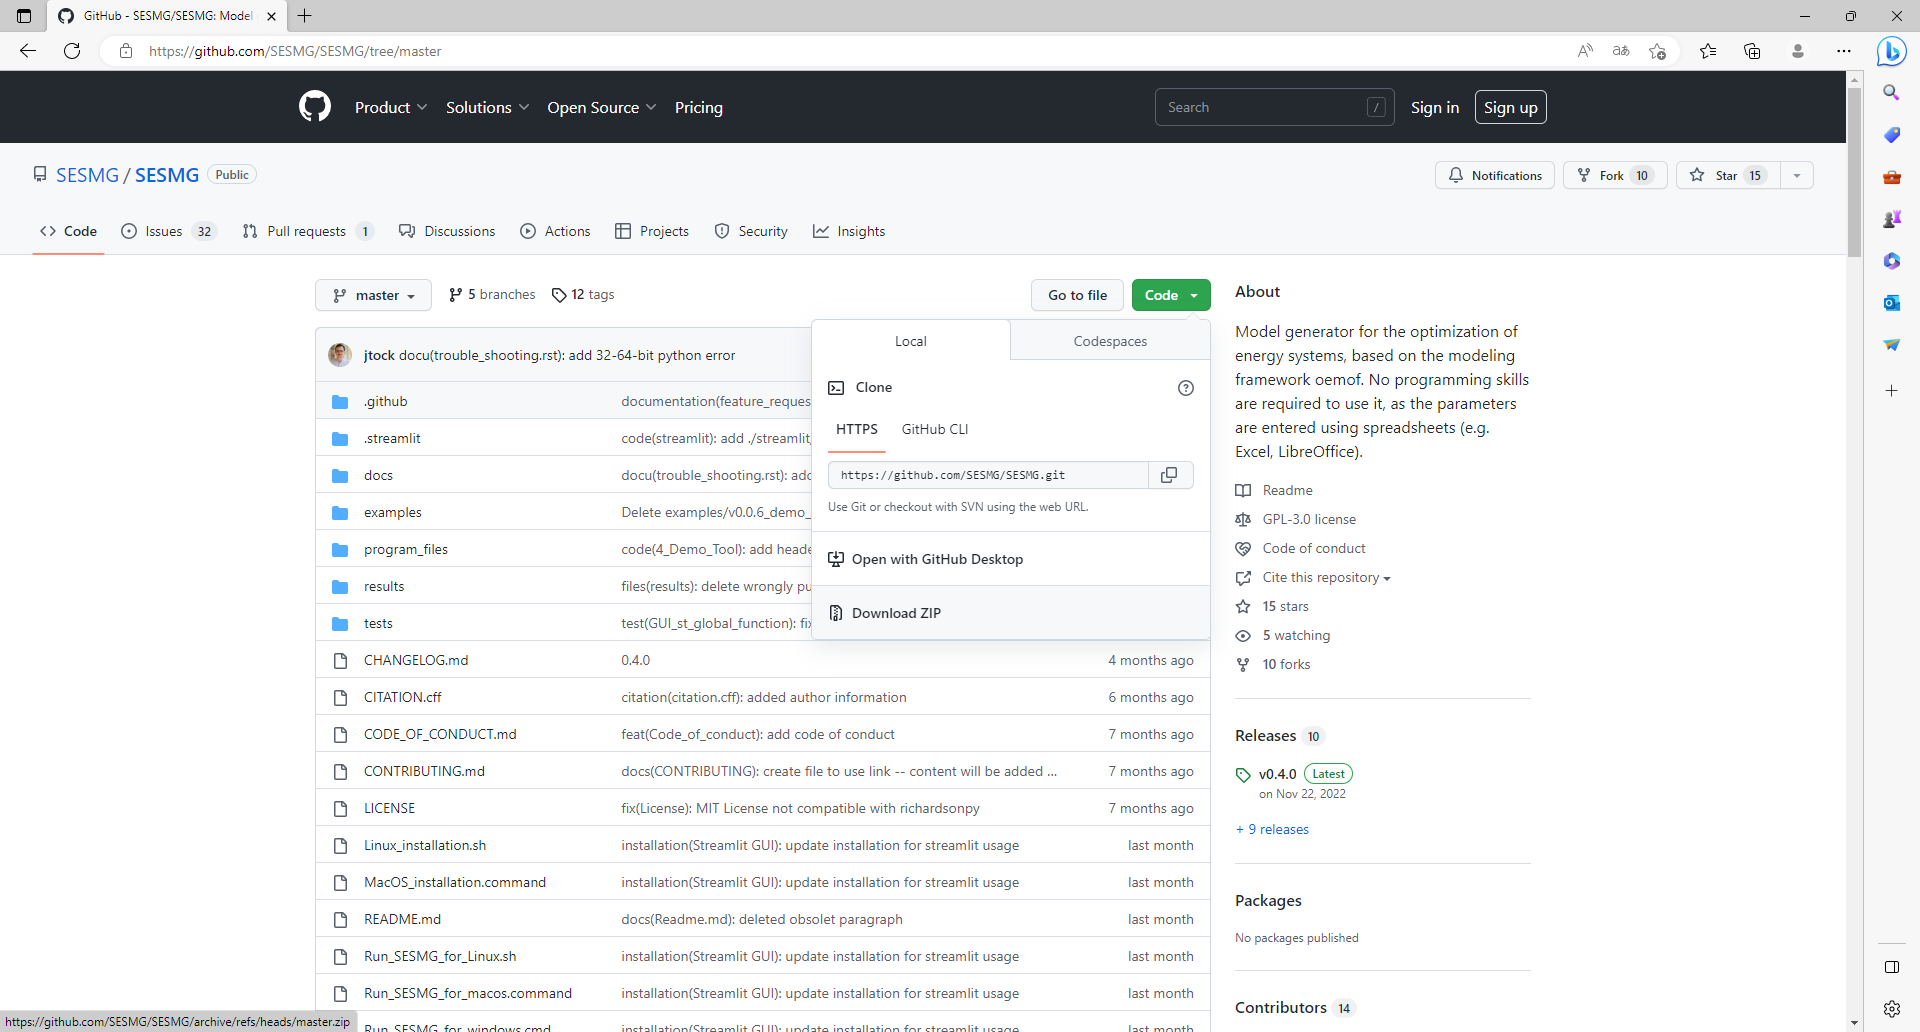
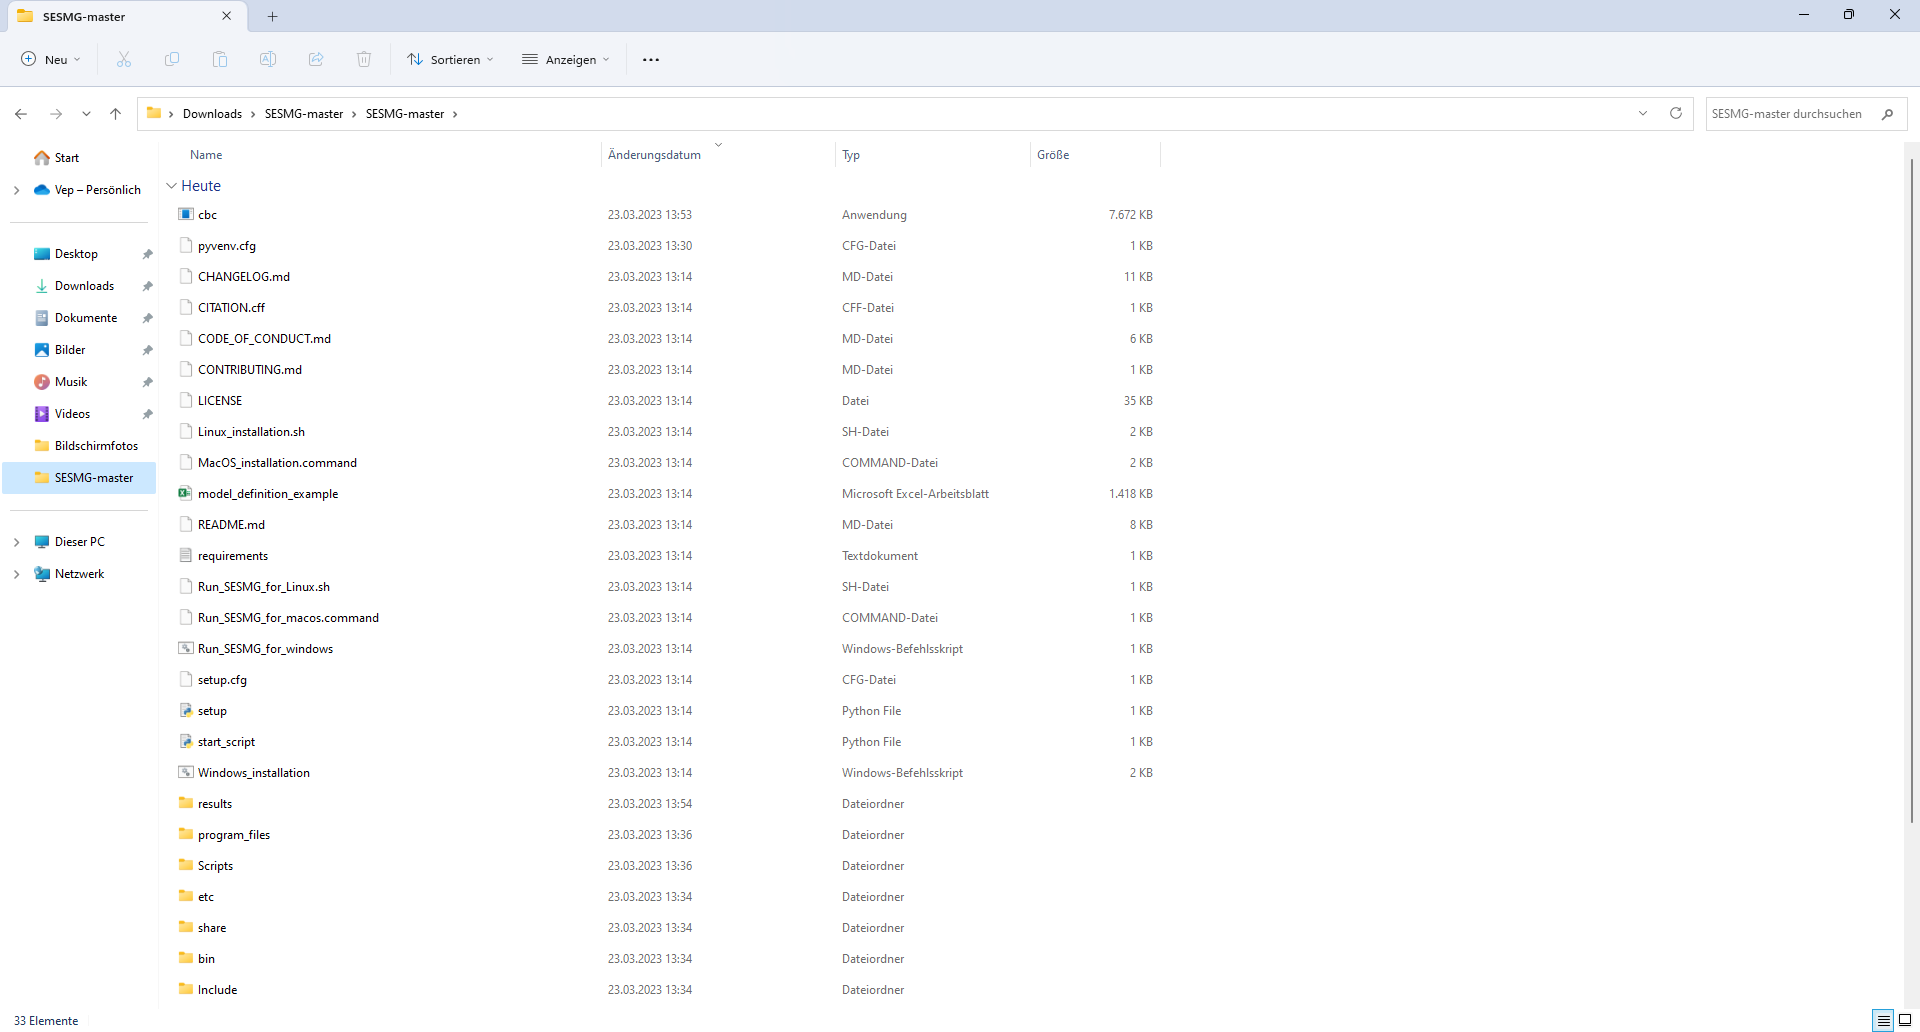
2. Downloading the SESMG Download the Spreadsheet Energy System Model Generator from GitHub as .zip folder and extract the .zip folder into any directory on the computer.
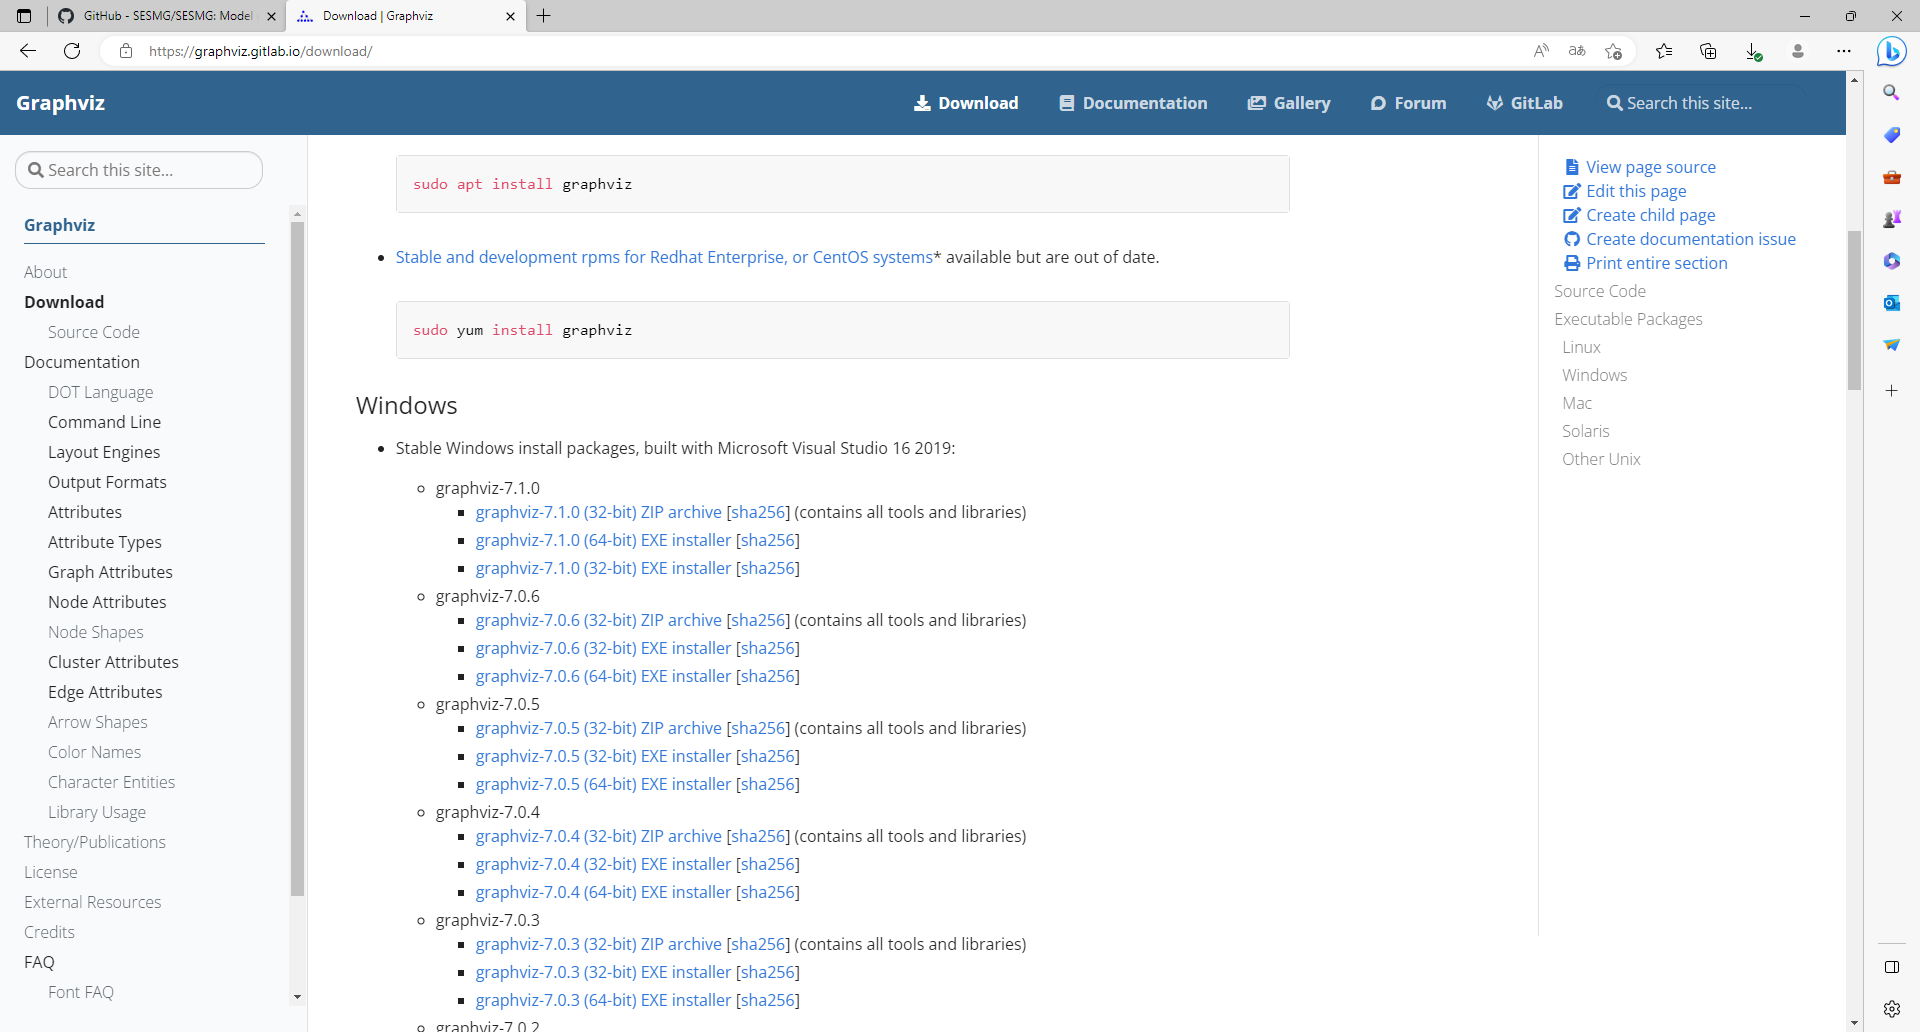
Installing Graphviz here: Graphviz download
Note
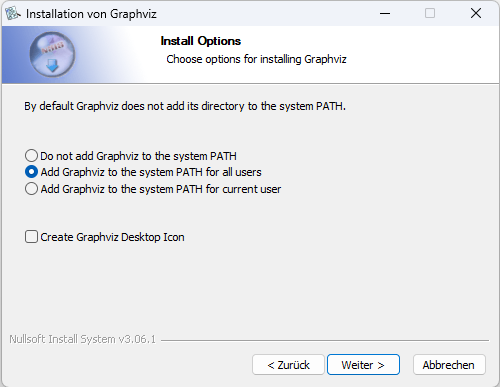
Make sure to select “Add Graphviz to system path for all users” at the beginning of the installation, otherwise you can use the default settings.
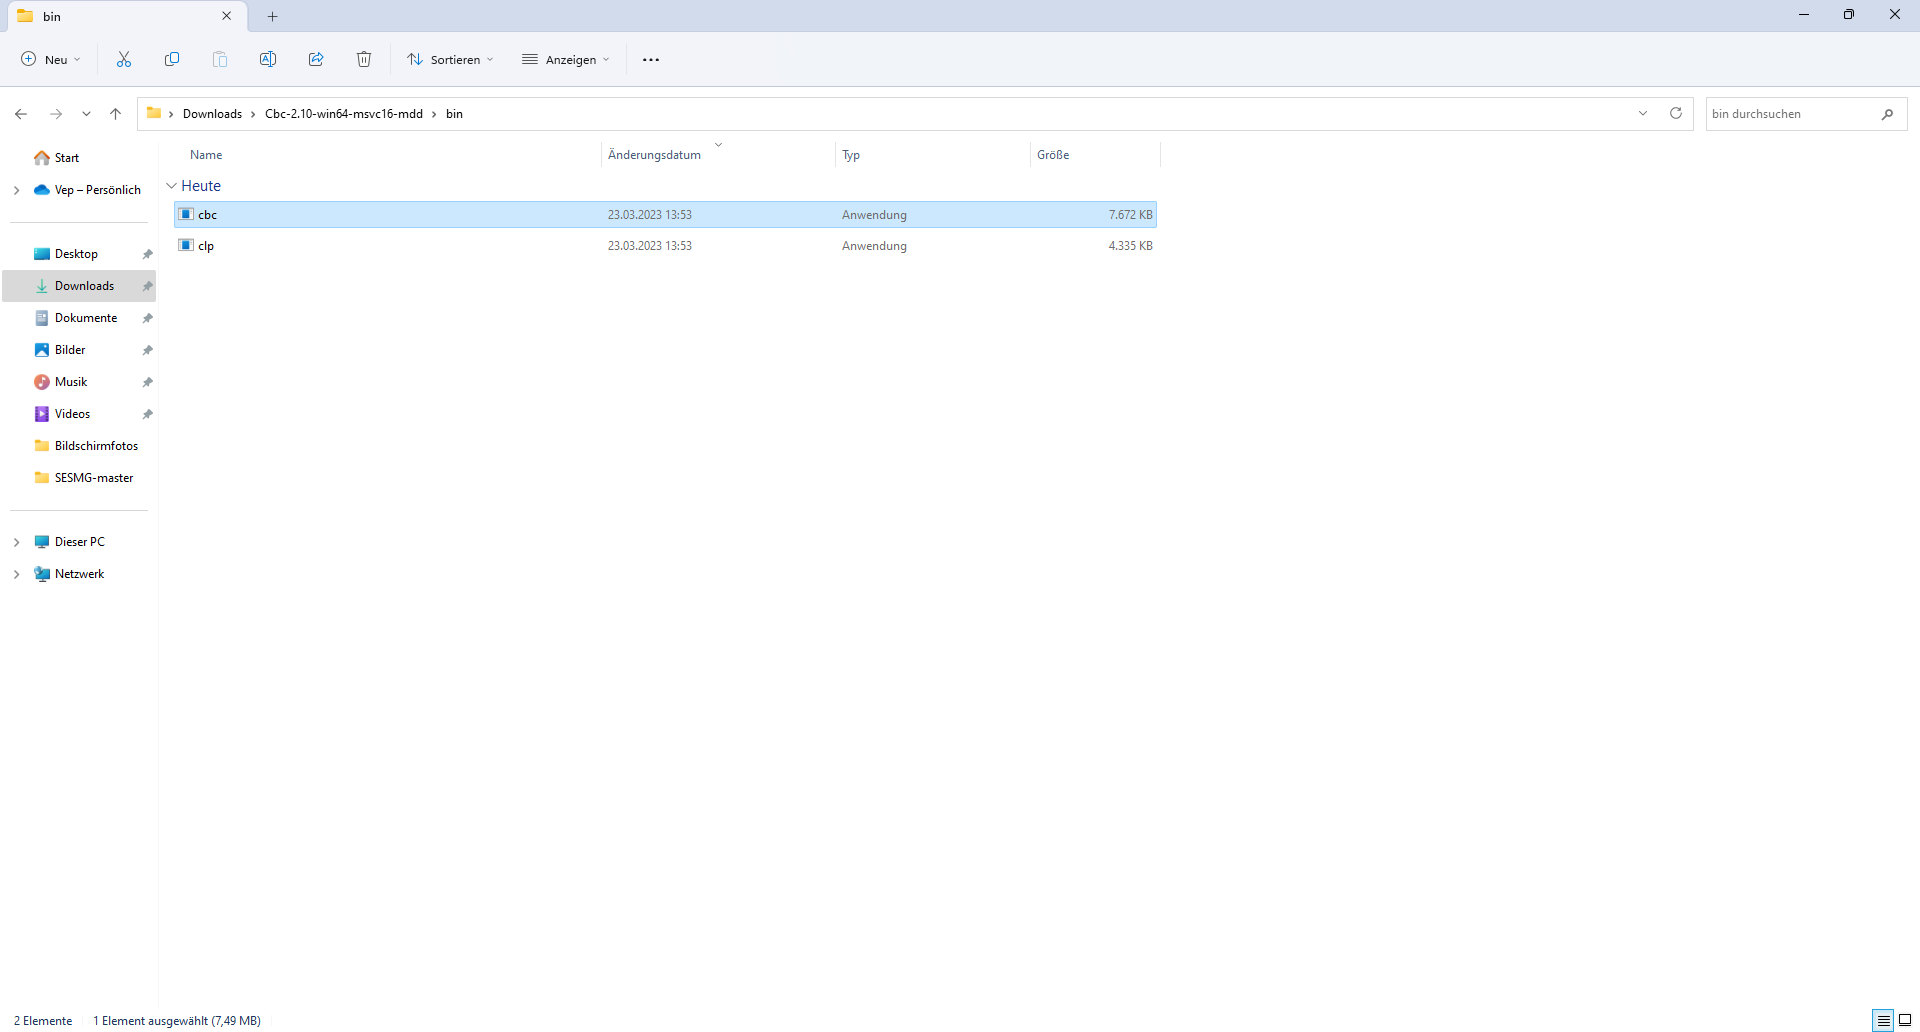
4. Installing the CBC-solver here: CBC-solver for windows. Alternatively you can uses the direct download link
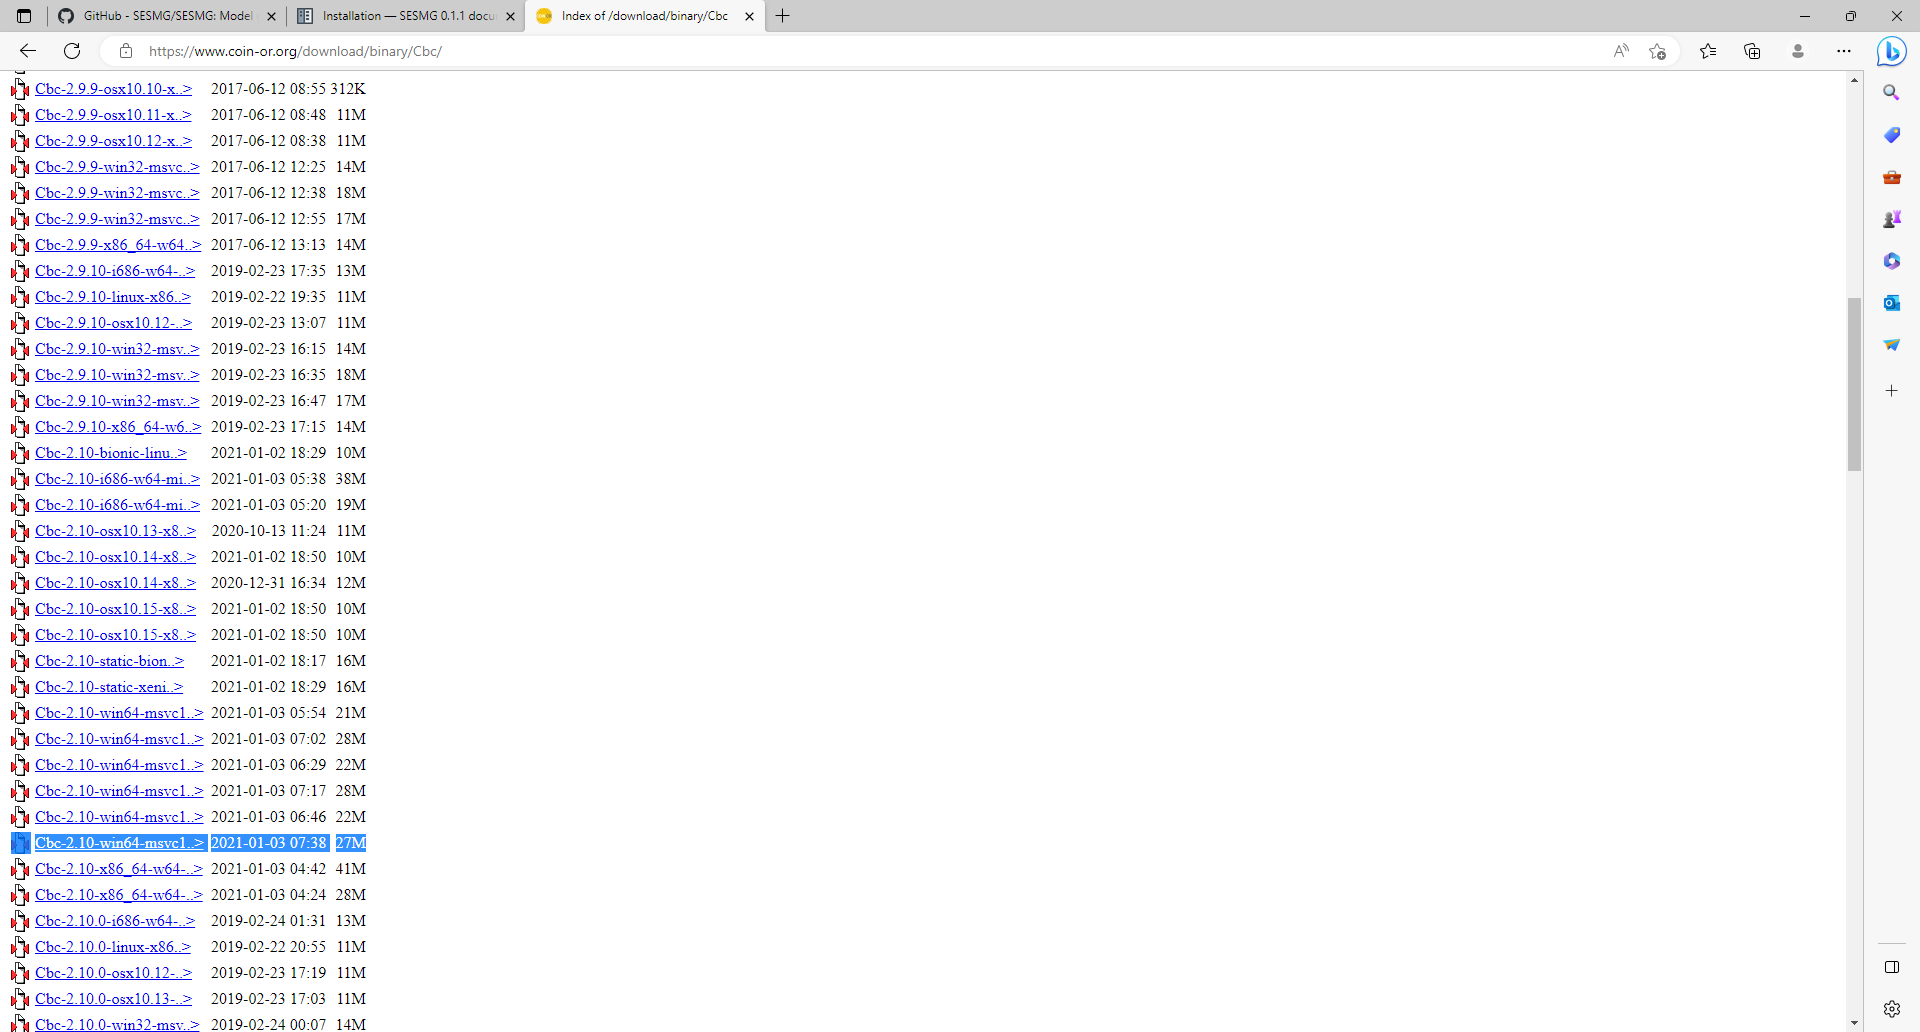
Note
Extract the .zip file and copy the CBC-solver (go to the bin-folder and use the cbc.exe) into the SESMG directory.
The gurobi-solver may be used as alternative to the CBC-solver. Be aware, that the gurobi-solver is not open-source and a license is required. However, the gurobi-solver may be faster for certain types of optimization problems, especially for those containing binary decisions. The installation procedure of the gurobi-solver is described in detail here.
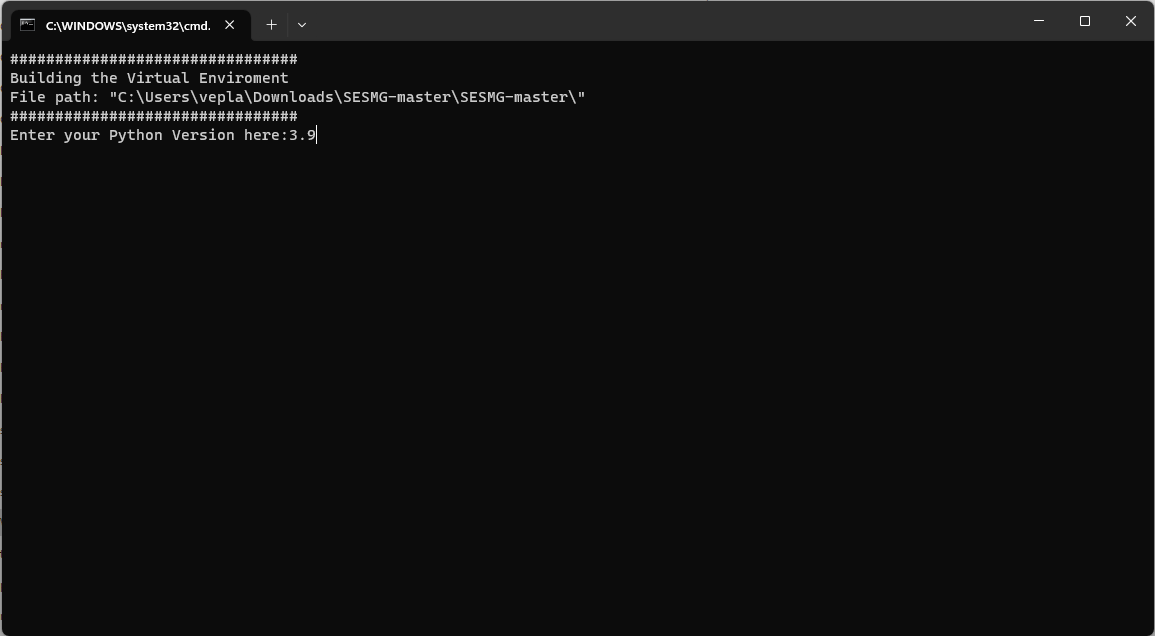
5. Installing the SESMG Execute the windows_installation.cmd and add your Python version (this may take several minutes).
Enter your Python version.
Note
Please type in your Python version in the major.minor format, which means to give 3.X if you have the version 3.X.YY. E.g. 3.9 if you have the Python version 3.9.13.
Note
There appears a warning after the installation process about the packages osmx and cartopy. The installation was successful, the SESMG will run normally and you can ignore this warning. Also see warning-001 troubleshooting.
Have fun with the SESMG.
Note
If you receive a “Your computer has been protected by Windows” error message, click “More Information,” and then “Run Anyway”.
Note
The application will create a SESMG directory when starting the first model run. By default it will be created in the /user/documents/ directory as /SESMG. You can change the folder structure by adjusting the GUI_st_settings.json file which you will find in the /program_files/GUI_st/ directory. You can change the directory by adding the preferred path to the GUI_st_settings.json. Make sure that each subdirectory is defined as its own list entry by following the given layout.
MacOS
Note
We recommended installing the SESMG as an admin or user with admin rights.
Installing Python (3.9, 3.10 or 3.11)
Go to the Python download page for macOS and download an installer.
Note
Make sure to use the installer referring to your chip (Intel-only or universal2) version (e.g. “macOS 64-bit universal2 installer” for mac with Apple M1 / M2). You can check the kind of built-in chip by opening the “About this Mac” option behind the apple icon in the above left corner.
Note
The SESMG is not compatible with the Python version 3.9.7, due to a conflicting bug in this version to the subpackage streamlit. You need to install another Python version or update to another Python version e. g. 3.9.13, which is widely tested.
Execute the installer on your computer.
Note
Make sure to select “Add Python to PATH” at the beginning of the Python installation.
2. Downloading the SESMG Download the Spreadsheet Energy System Model Generator from GitHub as .zip folder and extract the .zip folder into any directory on the computer.
Note
If your device does not have homebrew installed, install it by typing
/bin/bash -c "$(curl -fsSL https://raw.githubusercontent.com/Homebrew/install/HEAD/install.sh)"
in your terminal.
Note
Homebrew requires Xcode command line tools for macOS. Check if you already
have it installed by using xcode-select --help. If no error occurs it
is already installed. Otherwise run xcode-select --install in your terminal.
Note
For Apple CPU M1/M2: Make sure to follow the instructions while installing
homebrew. If there is a message to run two lines of code: do so and run them
separately in your terminal. Look for: (echo; echo 'eval "$(/opt/homebrew/bin/brew shellenv)"') >> /Users/YOURUSERNAME/.zprofile
and eval $(/opt/homebrew/bin/brew shellenv) with your username. Do
not run those lines if not requested.
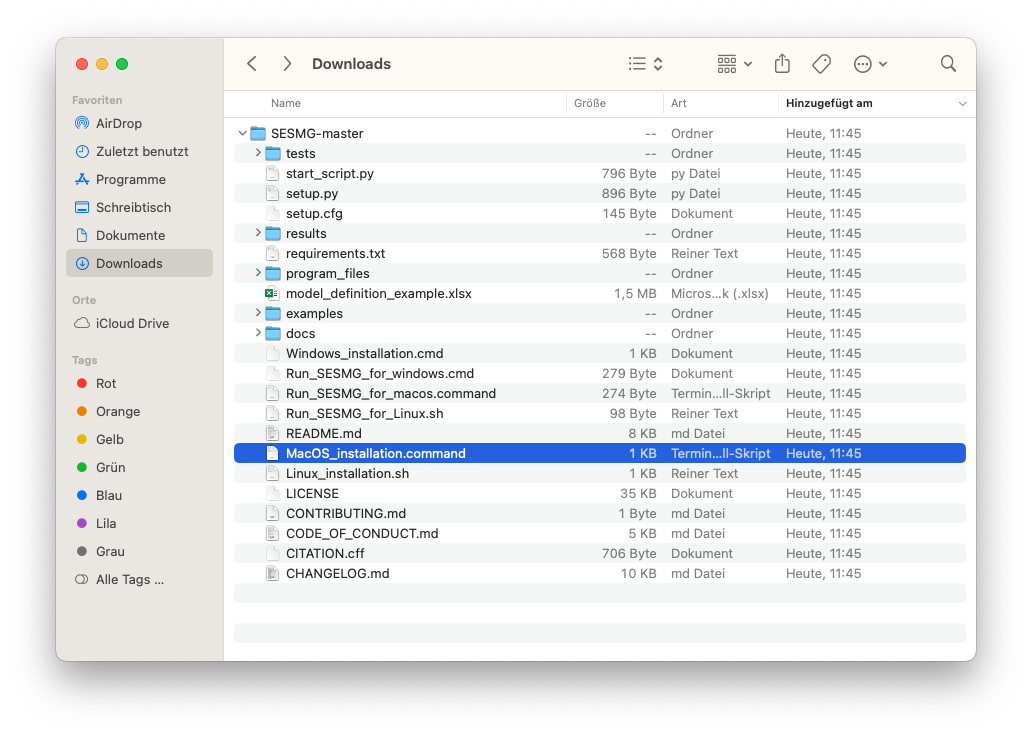
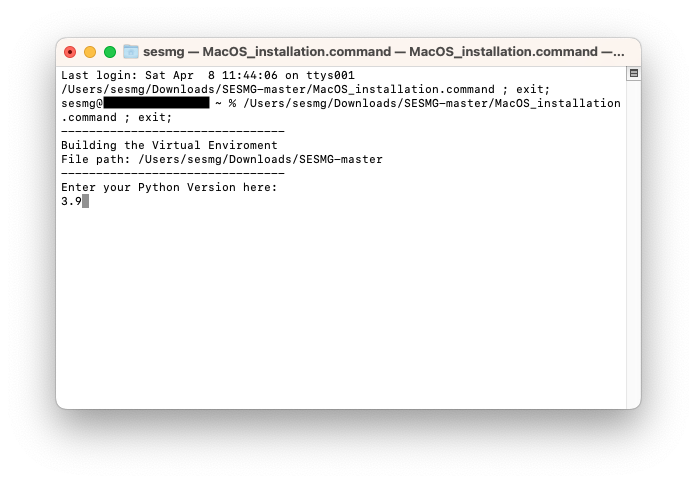
3. Installing the SESMG Execute the “MacOS_installation.command” file and enter your Python version to the terminal.
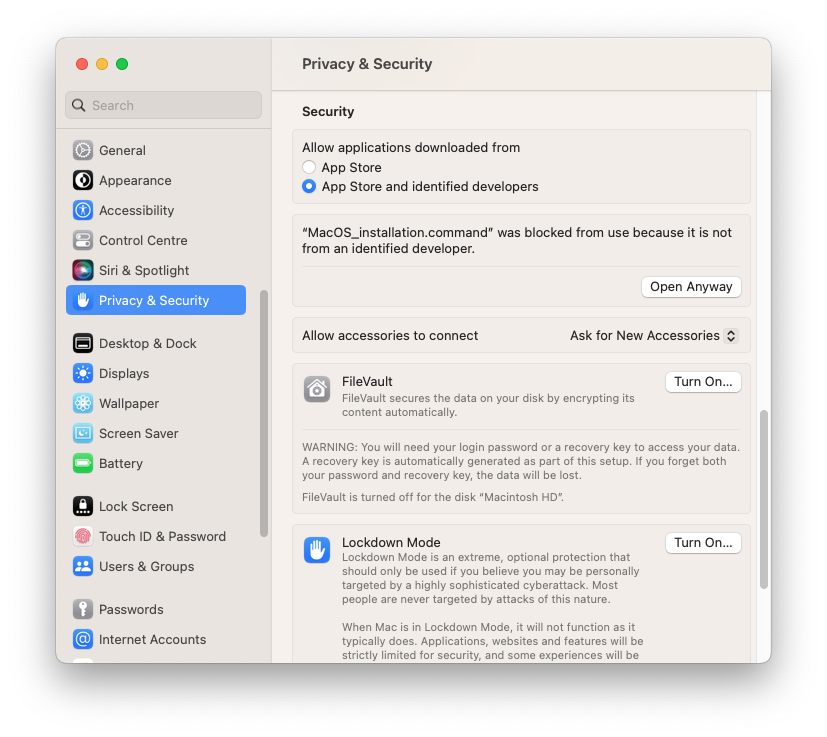
Note
You have to confirm the file run in your mac’s security settings to be able to run it. Confirm with ‘Open Anyway’.
Note
Please type in your Python version in the major.minor format, which means to give 3.X if you have the version 3.X.YY. E.g. 3.9 if you have the Python version 3.9.13.
Note
There appears a warning after the installation process about the packages osmx and cartopy. The installation was successful, the SESMG will run normally and you can ignore this warning. Also see warning-001 troubeshooting.
Note
During this step, the CBC-solver was automatically installed. The gurobi-solver may be used as alternative to the cbc solver. Be aware, that the gurobi-solver is not open-source and a license is required. However, the gurobi-solver may be faster for certain types of optimization problems, especially for those containing binary decisions. The installation procedure of the gurobi-solver is described in detail here.
4. Have fun with the SESMG. The Spreadsheet Energy System Model Generator has been installed.
Note
When running the SESMG for the first time using the Run_SESMG_for_macos.command file you may need to confirm again, as described above, in the security settings.
Note
The application will create a SESMG directory when starting the first model run. By default it will be created in the /user/documents/ directory as /SESMG. You can change the folder structure by adjusting the GUI_st_settings.json file which you will find in the /program_files/GUI_st/ directory. You can change the directory by adding the preferred path to the GUI_st_settings.json. Make sure that each subdirectory is defined as its own list entry by following the given layout.
Linux
Installing Python (3.9, 3.10 or 3.11)
Check your version with $ python3 --version.
Note
The SESMG is not compatible with the Python version 3.9.7, due to a conflicting bug in this version to the subpackage streamlit. You need to install another Python version or update to another Python version e. g. 3.9.13, which is widely tested.
2. Downloading the SESMG Download the Spreadsheet Energy System Model Generator from GitHub as .zip folder and extract the .zip folder into any directory on the computer.
Note
If no packages have ever been installed on the computer using apt-get,
sudo apt-get update must be executed first.
3. Install pip:
Installing
$ sudo apt-get install python3-pip
Installing Graphviz:
$ sudo apt-get install graphviz
Installing the CBC-solver:
$ sudo apt-get install coinor-cbc
Installing the libpq-dev to avoid a psycopg2 error:
$ sudo apt-get install libpq-dev
The gurobi-solver may be used as alternative to the CBC-solver. Be aware, that the gurobi-solver is not open-source and a license is required. However, the gurobi-solver may be faster for certain types of optimization problems, especially for those containing binary decisions. The installation procedure of the gurobi-solver is described in detail here.
7. Installing the SESMG Execute the “Linux_installation.sh” file. By first navigating to the path of the SESMG directory and then running the following:
$ ./Linux_installation.sh
Alternatively try:
$ sudo sh Linux_installation.sh
Enter your Python version.
Note
Please type in your Python version in the major.minor format, which means to give 3.X if you have the version 3.X.YY. E.g. 3.9 if you have the Python version 3.9.13.
Note
There appears a warning after the installation process about the packages osmx and cartopy. The installation was successful, the SESMG will run normally and you can ignore this warning. Also see warning-001 troubleshooting.
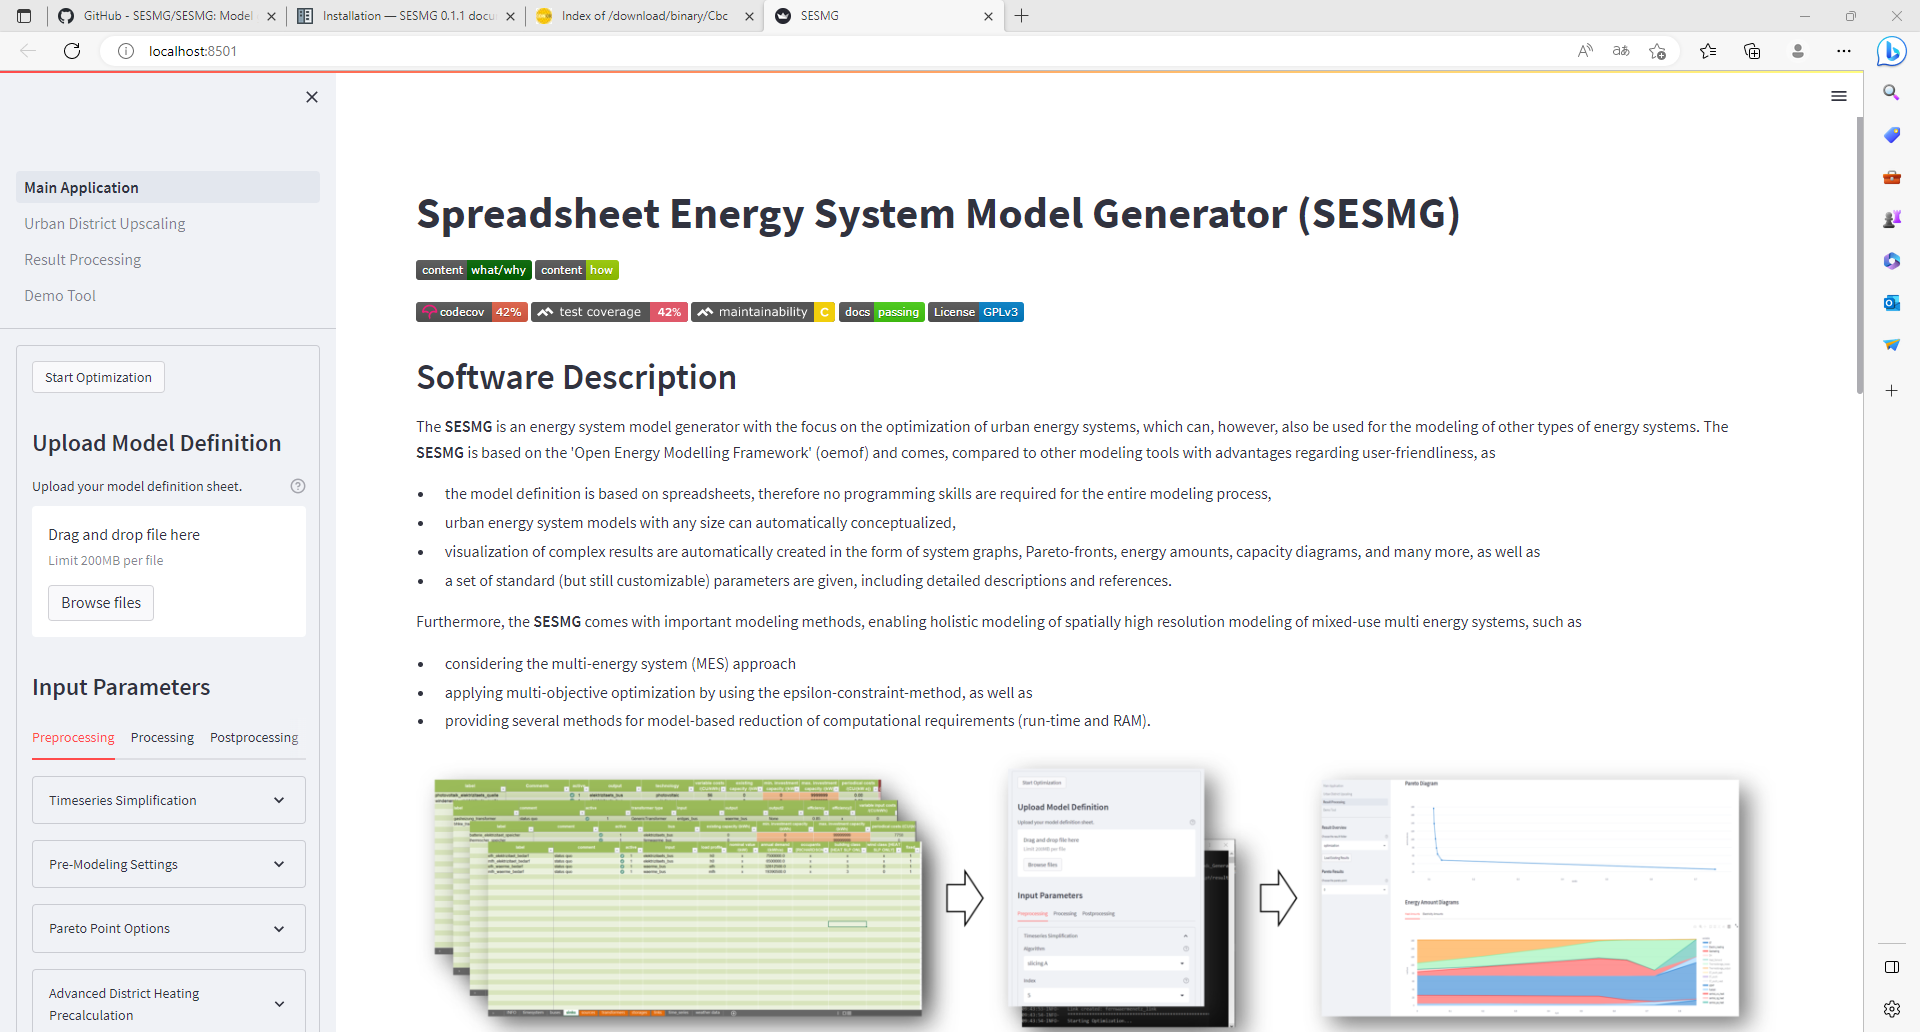
8. Running the SESMG
The Spreadsheet Energy System Model Generator has been installed. Open
localhost:8501 in a browser.
Note
The application will create a SESMG directory when starting the first model run. By default it will be created in the /user/documents/ directory as /SESMG. You can change the folder structure by adjusting the GUI_st_settings.json file which you will find in the /program_files/GUI_st/ directory. You can change the directory by adding the preferred path to the GUI_st_settings.json. Make sure that each subdirectory is defined as its own list entry by following the given layout.
Advanced
1. Download the SESMG by using git clone https://github.com/SESMG/SESMG.git
OR by downloading it manually from the SESMG Github repository.
Create a virtual environment of your choice for the SESMG folder
3. Install the following packages within the virtual environment: coincbc, graphviz, geos (MacOS only), postgresql (MacOS only), fiona (Windows only), gdal (Windows, only)
Note
The gurobi-solver may be used as alternative to the CBC-solver. Be aware, that the gurobi-solver is not open-source and a license is required. However, the gurobi-solver may be faster for certain types of optimization problems, especially for those containing binary decisions. The installation procedure of the gurobi-solver is described in detail here.
4. Use pip install -r requirements.txt to install the required sub-packages
in the virtual environment
Start the SESMG by executing start_script.py
Note
The application will create a SESMG directory when starting the first model run. By default it will be created in the /user/documents/ directory as /SESMG. You can change the folder structure by adjusting the GUI_st_settings.json file which you will find in the /program_files/GUI_st/ directory. You can change the directory by adding the preferred path to the GUI_st_settings.json. Make sure that each subdirectory is defined as its own list entry by following the given layout.
SESMG as Application
Warning
The SESMG as Application only work for the SESMG version v1.0.0. If you want to use the recent version you need to follow the extended installation instructions.
Windows
1. Installing Graphviz You can download Graphviz here: Graphviz download.
Note
Make sure to select “Add Graphviz to system path for all users” at the beginning of the installation, otherwise you can use the default settings.
Installing a solver
2a. The free and open-source CBC-solver is recommended for new users and users which are not facing any run-time issues. To use the solver, download the most recent Coin-or-OptimizationSuite-version for your operating system: Coin-or-OptimizationSuite for windows. Alternatively you can uses the direct download link. Restart your computer after succesfully installing the solver.
2b. The gurobi-solver may be used as an alternative to the CBC-solver. Be aware, that the gurobi-solver is not open-source and a license is required. However, the gurobi-solver may be faster for certain types of optimization problems, especially for those containing binary decisions. The installation procedure of the gurobi-solver is described in detail here. Restart your computer after succesfully installing the solver.
Note
Make sure to restart your computer before proceeding with the next steps.
3. Installing the SESMG application The latest released SESMG version can be accessed here: SESMG releases on Github. Download the SESMG.exe, unzip it, and place it in a directory of your choice. Open the SESMG application by running SESMG.exe. The starting process usually takes a few minutes.
Tip
With the first use you may have to confirm in windows-defender or other protection software that the SESMG is trustworthy. The exact warning message may differ depending on the system language and anti-virus software.
Tip
While the SESMG is starting, a message like “the website is not available” may appear. Wait a moment and press “reload”. If necessary, repeat this step. The exact warning message may differ depending on the system language and applied browser.
Note
The application will create a SESMG directory when starting the first model run. By default it will be created in the /user/documents/ directory as /SESMG.
MacOS
1. Installing Graphiz You kann download Graphiz here: Graphiz download
Note
Make sure to select “Add Graphviz to system path for all users” at the beginning of the installation, otherwise you can use the default settings.
2. Installing a solver You can download the free and open-source CBC-solver here: cbc solver for MacOS. Alternatively you can use Homebrew to install the CBC-solver by following the instructions from Brew.
The gurobi-solver may be used as an alternative to the CBC-solver. Be aware, that the gurobi-solver is not open-source and a license is required. However, the gurobi-solver may be faster for certain types of optimization problems, especially for those containing binary decisions. The installation procedure of the gurobi-solver is described in detail here.
3. Installing the SESMG application You will find the latest released SESMG version here: SESMG releases on Github. Download the SESMG.dmg, open it and place the application in a directory of your choice. You can change the directory afterwards.
Due to a bug in a subpackage it is not possible yet to open the SESMG as commum
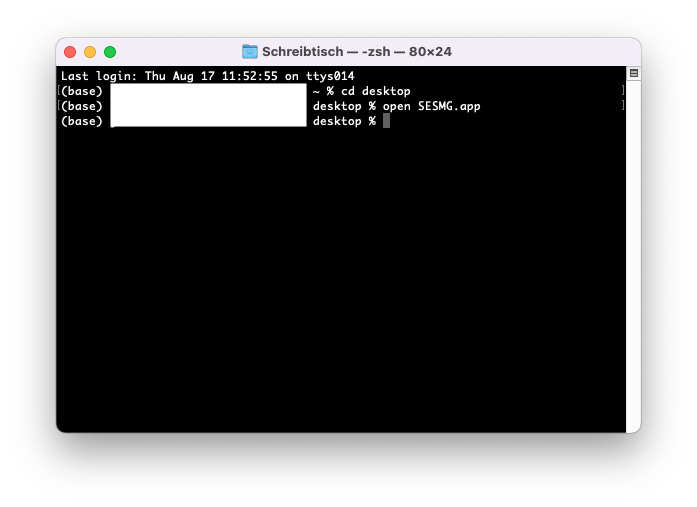
by double-clicking it. You need to use the terminal to open the application.
Navitage to the directory by using the command inputs (e. g. cd) or right-click
the folder in which the application is placed (e. g. “desktop”) and choose
“new terminal at the folder”. Type in the command open SESMG.app.
Note
You have to confirm the file run in your mac’s security settings to be able to run it. Confirm with ‘Open Anyway’.
Be aware that it can take several minutes and will be running withouth any loading or progress screen. Check your taskmanager to be sure the process startet by looking for SESMG.
Warning
A known issue for macOS is that the programm does not close when you close the app. To kill all processes you need to use your taskmanager and stop the “SESMG”-processes manually. Make sure to kill it after each session. Otherwise you will not be able to reopen it by using the way described above. The problem is caused by a subpackage. We are working on a better solution!
Note
The application will create a SESMG directory when starting the first model run. By default it will be created in the /user/documents/ directory as /SESMG.
Linux
Installing Graphviz:
Note
If no packages have ever been installed on the computer using apt-get,
sudo apt-get update must be executed first.
$ sudo apt-get install graphviz
Installing the CBC-solver:
$ sudo apt-get install coinor-cbc
The gurobi-solver may be used as alternative to the CBC-solver. Be aware, that the gurobi-solver is not open-source and a license is required. However, the gurobi-solver may be faster for certain types of optimization problems, especially for those containing binary decisions. The installation procedure of the gurobi-solver is described in detail here.
3. Installing the SESMG application You will find the latest released SESMG version here: SESMG releases on Github. Download the SESMG.deb and place it in a directory of your choice. You can change the directory afterwards. Open the SESMG application by running the executable file as commum. Be aware that it can take several minutes and will be running withouth any loading or progress screen. Check your taskmanager to be sure the process startet by looking for SESMG.
Note
The application will create a SESMG directory when starting the first model run. By default it will be created in the /user/documents/ directory as /SESMG.
Defining the SESMG system rights
Use the following two commands in your terminal after installing the SESMG.
sudo apt install -y libfontconfig1-dev libfreetype6-dev libx11-dev
sudo apt install -y libx11-xcb-dev libxext-dev libxfixes-dev
sudo apt install -y libxi-dev libxrender-dev libxkbcommon-dev
sudo apt install -y libxkbcommon-x11-dev libatspi2.0-dev libopengl0
sudo apt install -y '^libxcb.*-dev' libgl1 libegl1 libdbus-glib-1-2
sudo chmod -R 755 /opt/SESMG
Warning
A known issue for linux is that the programm does not close when you close the app. To kill all processes you need to use your taskmanager and stop the “SESMG”-processes manually. Make sure to kill it after each session. Otherwise you will not be able to reopen it by using the way described above. The problem is caused by a subpackage. We are working on a better solution!